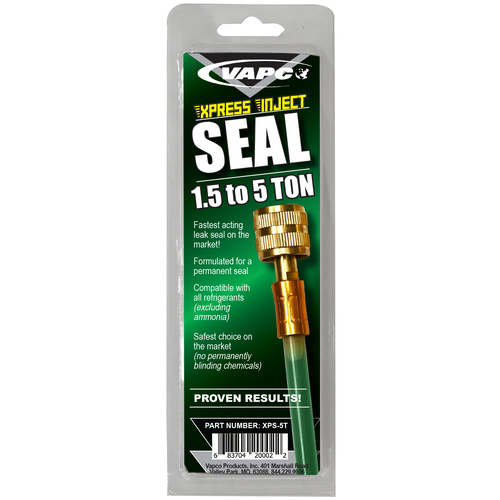
Product Description
KITCHEN SINK WITH UV DYE – is our most powerful and versatile all-in-one product ever. It provides a UV dye for locating leaks, the fastest-acting leak sealant on the market, formulated for a permanent seal, eliminates and prevents acid, removes moisture, reduces noise, and increases efficiency. It is available for systems up to 60 tons.
KITCHEN SINK WITH UV DYE is the ideal solution for easily locating refrigerant leaks, enhancing system performance; preventing and attacking moisture that can cause acid formation in refrigerant lines; and sealing small holes. The product’s UV dye is the brightest on the market, often visible by just the naked eye. Easily locate leaks with the dye’s vibrant violet hue.
Features and Benefits of Kitchen Sink with UV Dye
- Fastest Acting Leak Sealant on the Market
- Formulated for a Permanent Seal
- Eliminates Acid
- Removes Moisture Prevents Acid
- Reduces Noise
- Increases Efficiency
- Includes the brightest dye on the market today
Part Number; Size
- XPS-5T-KSD
- 1.5 to 5 Ton
- XPS-15T-KSD
- 6 to 15 Ton
Compatible with all refrigerants excluding ammonia.
Directions:
NO SPECIAL TOOLS REQUIRED
TRADITIONAL METHOD:
1. Turn the a/c system on and verify the unit is running. Connect Xpress Inject to the low-side service port of the system. (This is generally the large line).
2. Connect the manifold refrigerant hose to the refrigerant supply tank. Verify the high and low side valves on the manifold are closed before proceeding. Purge the low-pressure hose when connecting to Xpress Inject.
3. Open the low-side valve and watch for the tube to clear. (This will ONLY take a few seconds!) Turn off the low-side manifold valve as soon as the tube is clear. Turn off refrigerant gas. Verify the system is charged to the manufacturer’s specifications! Disconnect low-side hose from Xpress Inject. Install service port cap. Run the a/c unit at least one hour after installing Xpress Inject. (Do not bend or kink hose!)
DIRECTIONS FOR DIRECT INJECT HOSE:
Turn the A/C system on and then check to see if the compressor is on and the system is fully charged.
- Ensure the ball valve is closed before attaching the “A” side of the hose to the high-pressure service port.
- Barely thread the male end of the injector tube to the “B” side of the hose. Do not depress the valve. Next, crack open and close the ball valve to remove air from the hose. Then, thread the tube into the “B” side of the hose.
- Connect the female end of the injector tube to the low-pressure service port and then open the ball valve. Let refrigerant flow through and then inject the product into the system. Close the ball valve and then disconnect the hose and injector from the unit.
- Remove the tube from the “B” side of the hose and open the ball valve to release charge. This prevents contamination.
INSTALLATION WITH VAPCO DIRECT INJECT GUN:
Turn the A/C system on and verify the unit is running. With the CO2 cartridge in the gun, connect the Xpress Inject to the Direct Inject Gun. Connect the other end to the low-side service port. Briefly pull the trigger. The direct Inject Gun will meter just enough CO2 to the empty tube. The sealer has now been injected into the system. Disconnect the empty tube from the low-side port. Install service port cap. Run the A/C unit at least one hour after installing Xpress Inject. 12+ uses per CO2 cartridge.
DANGERS & PRECAUTIONS:
Read and understand the product’s label and Safety Data Sheet. May be fatal if swallowed and enters airways. Highly flammable liquid and vapor. May cause skin irritation. Toxic to aquatic life. DO NOT use it in any manner for which it was not designed. Always wear PPE (Personal Protective Equipment) when servicing HVAC equipment. Do NOT handle or use this product until all safety precautions have been read and understood. Keep away from heat/sparks/open flame/hot surfaces – NO SMOKING! Do not breathe dust/fume/gas/mist/vapors/ spray. Wash hands and arms thoroughly after handling. Use only outdoors or in a well-ventilated area. Avoid release to the environment. Wear protective gloves/clothing/face/ eye protection.
Equivalent Part Numbers: XPS5TKSD


